

Photo by Pedro Monteiro on Unsplash
Creating My Portfolio
👨💻All these social networks, and these computers👨💻


Table of contents


No headings in the article.
Overview
While my blog is hosted on Hashnode, I wrote the home page, located at alexelfuerte.com, by myself.
I've made many portfolios in the past, some with React, some with Angular, but I decided those technologies would add complexity to my website with out any benefit. If I feel the need to make my website more complex, I will explore those options, but I'm happy with my current build.
Tech Stack
Languages Used
- HTML
- Provides the website's structure and layout
- CSS
- Styling, colors, and some effects
- Bootstrap is used for the card elements, as well as the grid functionality, which is much easier to work with compared to building a CSS grid from scratch
- JavaScript
- Page visitor counter
- Connecting to SQL / Azure Cosmos DB
- C#
- Used to write my Azure Function which fetches and updates the Cosmos DB visitor count each time an HTTP GET request came in
- Bicep
- I used Bicep to deploy my Cosmos DB database
- I could have (and perhaps should have, according to Microsoft's documentation...) used the Portal, but I wanted to try out Bicep
- It was a lot of fun using it, I will try to use it more in my other projects
Other Technologies
- Azure
- For hosting my web page with Azure Static Web Apps, which is more cost effective compared to running a web server with a virtual machine
- I also bought my domain with GoDaddy, but transferred control to Azure DNS so that I can have control over my website in one place
- Cosmos DB (SQL)
- This is only used to store the number of people who have visited my website
- Cosmos DB is an Azure service
- Git
- I tried a few different versions of my website, so Git helped me keep track of my changes
Analysis of the Infrastructure
Custom Domain Name Setup
I purchased my domain from GoDaddy, and from there I delegated control of the name servers to Azure, which allowed me to maintain the DNS records through the Azure Portal. This is done by creating a DNS Zone in Azure, copying the name servers that Azure provides when you create the Zone, and pasting those name servers into the DNS settings on the website where you purchased your domain from.
I followed Microsoft's documentation here: docs.microsoft.com/en-us/azure/static-web-a..
From there I was able to connect my custom domain to my website by creating CNAME, TXT, and ALIAS records. To deploy my code to Azure Static Web Apps, I set up the deployment source to be my GitHub account (github.com/AlexTheAlien) so that my website will be updated when I push my code to the repository.
My Blog
Initially, I wanted to boot up a VM in Azure and run WordPress on it, which would have allowed me to practice deploying resources with Bicep. However, I looked at the cost of a B1s Linux VM in Azure, and compared it to the cost of Static Web Apps (which has a permanent free tier, instead of ~1 month of free usage on a VM), and decided that Static Web Apps was the most cost effective choice, and it integrated well with my GitHub account.
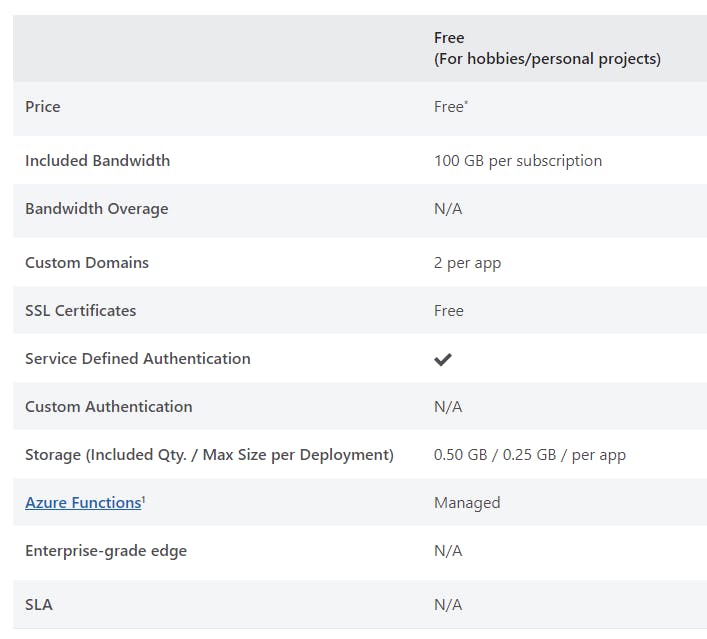 Static Web Apps has a free tier that does not expire
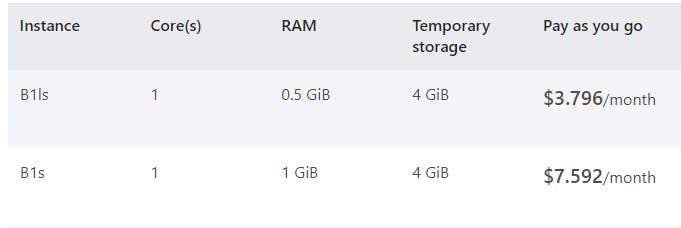 Free is cheaper than these two Linux VMs. Although I have 750 B1s hours free, that lasts about 1 month, and I want to use that month on a different project.
I was still able to deploy resources for my website with Bicep, and now I have 1 month of free B1s virtual machines to use for a LAMP stack project.
The home page of my website was written in HTML, CSS and JavaScript, with some styling from Bootstrap. I could have chosen something like React, Angular, or Vue (and I have made my past portfolios with those technologies) but I decided that I would choose something that was simple yet still let me make my website exactly as I want it.
In the future, I may decide to make a new website with more features, which would be handled better by frameworks/libraries like React, but for now and the foreseeable future, my current tech stack works.
Integration with Cosmos DB and Azure Functions
This was the tough part.
In order for the website visitor counter functionality to work, I needed to store the visitor count on a database somewhere other than the client's local PC, which is what I was doing in my personal testing. Different users would see different counts, and if a user cleared the cache on their PC, the count would reset back to 0. Using an external database was the solution.
I knew what Azure functions were before starting the project, but I hadn't wrote any functions before, and I didn't know how to get started writing them. I needed the functions to communicate with Cosmos DB (which I also had no actual experience with), and so figuring that part out was challenging.
I followed a great tutorial on this from Gwyneth Peña-Siguenza (GPS) and combining that with the Microsoft Learn modules for Azure Functions and Cosmos DB gave me more than enough to get the visitor counter working.
My Azure Function was written in C#, a language that I enjoy writing in, and I was able to complete the function in under an hour.
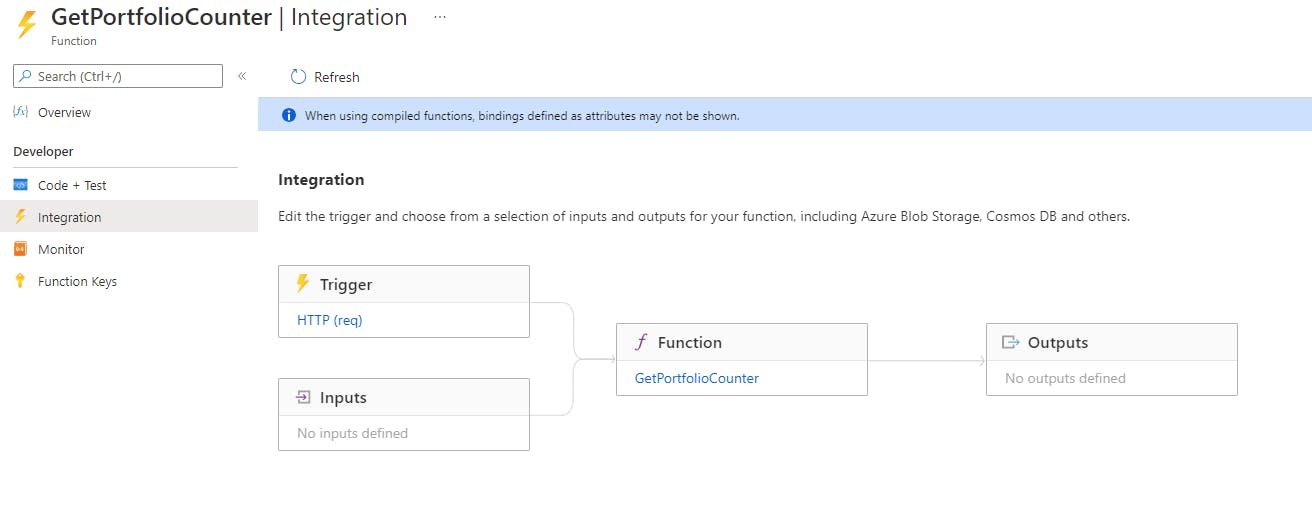 The Integration page for my Azure Function, which I think looks cool.
For Cosmos DB, there is a free tier that gives the first 400 R/Us each month for free when you use provisioned throughput, and although serverless would have been very cheap, I chose provisioned throughput for the free 400 R/Us.
Thoughts on Git
I have used Git for GitHub deployments many times, but I always found branching, merging, checkouts, and other core features of Git to be very daunting, and it felt like it was a lot to learn.
Thankfully, after practicing Git with a few test files and using it on my website, I can say that I really do like Git and it's a valuable tool that I want to become proficient in.
Links
- GitHub repository for my website: github.com/AlexTheAlien/alexh
- My website: alexelfuerte.com
- A great video by Colt Steele for getting started with Git: youtube.com/watch?v=USjZcfj8yxE
- Connect with me on LinkedIn: linkedin.com/in/alex47
🧙♂️